New Year, New Range: Easy Merch Bundles For Artists On A Budget
Share
January is a brilliant time to refresh your shop, try new ideas, and set a simple plan you can actually keep. If you want to turn your artwork into an affordable, cohesive merch range, you do not need a huge budget or giant quantities. Start small, test, then scale what sells. Here is a friendly, practical guide to building a 3 to 5 product starter bundle that feels consistent, looks polished on a stall or website, and keeps your cash flow happy.
What products are best for a starter merch range?
Aim for items that sit together as a set, work at different price points, and use the same artwork. A tidy, proven combo:
Coasters
Mugs
Tea towels
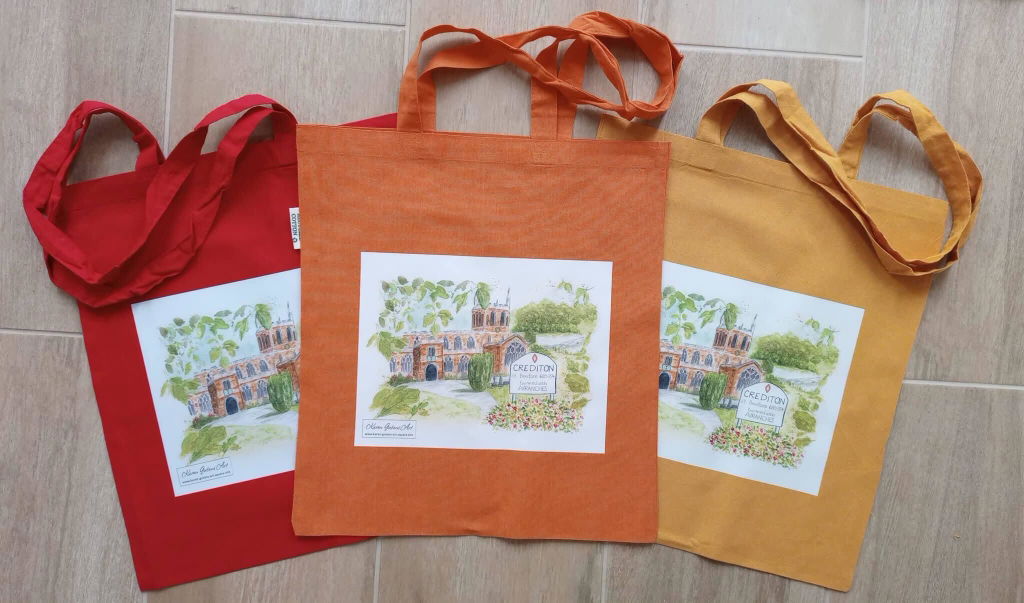
Tote bags
Optional additions once you get traction:
Placemats to pair with coasters
Glass chopping boards as a higher ticket hero
Small impulse items like compact mirrors coming soon, perfect for quick refreshes later in the year
Why this mix works:
- Visual cohesion, one artwork used across all items builds brand recognition.
- Easy displays, a matching cluster catches the eye in seconds.
- Tiered prices, you can offer low, mid, and higher price points to suit different customers.
If you want something bolder for kitchen lovers, try a bundle with coasters, placemats, and a glass chopping board. Our pages for glass chopping boards and chopping boards glass are a great place to explore finish options that show off colour and detail.
Keep costs low with small quantities
You can absolutely keep spend down by ordering in small batches. Here is how:
- Start with singles and tiny test runs, order one of each product to see how your artwork prints, then move to small sets of 6 or 12 if you like the result.
- Use tiered pricing to your advantage, once you confirm a seller, step up to the next quantity break to reduce your unit cost and improve margin. (We will be looking to add more tiered pricing on a larger range of products)
- Mix margin, carry one or two higher margin items, such as mugs or glass boards, to balance lower margin basics.
Quick budget checklist:
- Pick 1 artwork to start, keep it simple and cohesive.
- Order one sample of each product.
- Confirm colour, crop, and sharpness in real life.
- Choose your first tier, for example 6 or 12 units.
- Reinvest profits into your next artwork or an add on product.
Margin planning with tiered pricing
Set your retail based on a clear margin target, for example 2.2x to 2.8x your unit cost. Tiered pricing means your unit cost goes down as quantities go up, so your margin rises too. A simple approach:
- Launch price, set a fair retail price based on your single or small run unit costs.
- Bundle offer, create a small discount when customers buy two or three matching pieces, for example mug plus coaster, or mug plus tea towel plus tote.
- Step up, when a design starts to sell regularly, reorder at the next tier to drop your unit cost and keep your retail steady. Your margin improves without any awkward price changes.
(as mentioned above we are going to look if we can add in more tiered pricing to other products)
Tip, track your conversion per design rather than per product. If one illustration powers repeat sales across coasters and tea towels, that is your keeper.
Test first, then scale
Testing protects your budget and gives you confidence in what to stock for spring markets. A simple test plan:
- Order single items to see how your artwork looks on gloss, fabric, and glass.
- Share photos with your audience and ask for preferences on colour and background.
- Take samples to one market or pop up, gather quick feedback and note top comments.
- Review sales by product, margin, and customer questions after one event, then choose two keepers to reorder at the next tier.
Mini feedback checklist:
- Which item got the most pick ups at your stall?
- Did customers ask for a set, such as matching coasters and a mug?
- Were colours true to your original painting or print?
- Any comments about text size or details being too small?
Artwork prep that saves headaches
Small format items can be unforgiving. A few prep reminders make a big difference:
- Use high resolution files at 300 dpi, sized to final print.
- Keep important details away from edges, avoid cropping against seams or edges on totes and tea towels.
- Boost contrast for mini items like coasters, pick a clear focal point that reads from a distance.
- Simplify busy backgrounds, textures on fabrics can soften perceived sharpness.
- Check safe areas per product, some items have recommended print zones for best results.
A quick proof or sample is the best way to confirm colours. If you are ever unsure, please do get in touch with the team for sizing, cropping, and colour check advice.
Can you get artwork printed, and how do you make prints of your artwork?
Yes, you can get your artwork printed on a wide range of products. If you want to print your artwork on products uk, you can order single items to test, then build up to bundles. To make prints of your artwork for merch:
- Photograph or scan at high resolution.
- Edit for brightness, contrast, and crop with safe margins.
- Export at 300 dpi at the final size.
- Upload with a sensible UNIQUE image title for easy reorders.
- Order a single sample before bulk runs.
If you are focusing on tableware, explore printing placemats and coasters to create matching sets that sit well with mugs and tea towels.
Bundle ideas you can launch this month
Kitchen cosy set:
Coasters set of 4
Mug
Tea towel
Optional, placemat pair for a higher price tier
Market day shopper:
Tote bag
Mug
Coaster
Greeting card featuring the same artwork
Home gift duo:
Glass chopping board as the hero item
Matching coaster or placemat for a small upsell
Want to add a little colour twist, consider two tone mugs to match accent colours from your artwork.
How to decide your keepers
Use a simple rule, keep what sells fastest and gets the clearest compliments. After two or three markets:
- Keepers, any item that sells through 60 percent or more of your first batch.
- Pause, products that move slowly or attract repeated questions about colour or crop.
- Iterate, keep the product but refresh the artwork, lighten backgrounds, increase contrast, or re crop to avoid edge tension.
Remember to make notes on questions. If lots of people say they love a certain palette, you have your next design brief sorted.
Refresh your range mid year
When you want a mini refresh without a full redesign, add a new small accessory. Compact mirrors are coming soon, ideal as a low cost add on that uses your best selling artwork. You can also rotate a seasonal piece, for
example a spring floral on coasters and a tote while keeping your evergreen mug design.
Where to start today
- Pick one artwork you are proud of.
- Order single samples of a coaster, a mug, a tea towel, and a tote.
- Gather quick feedback from your audience.
- Choose two keepers and reorder at the next tier for better unit costs.
- Photograph your set together for a tidy, cohesive product page.
If you are ready to see your artwork printed with bright, durable results, explore our site. You can also browse photo printing coasters if you want to build sets that pair with mugs and tea towels. And if bold kitchen pieces
are your thing, our glass chopping boards make strong centrepieces for gift bundles.
Summary
You do not need a massive budget to launch a tidy, cohesive merch range in January. Choose 3 to 5 products that share one artwork, test with single items, and use customer feedback to pick your keepers.
Plan your margins with tiered pricing so your unit costs drop as you scale, and refresh mid year with a small accessory like compact mirrors. Keep artwork prep simple, high resolution files, clear focal point, good contrast, and safe edges.
If you would like hands on help with cropping or colour, please do get in touch, we are happy to support you from first sample to full bundle.